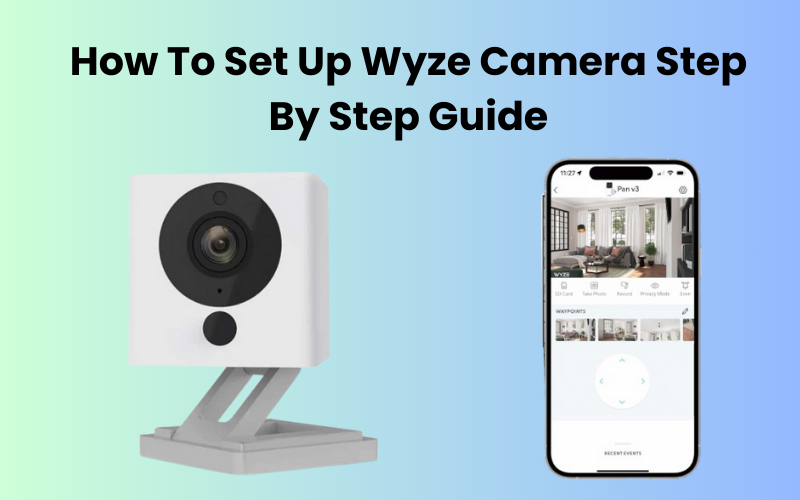
Wyze camera has gained significant popularity over other brands as a choice for home security cameras. It comes with a budget-friendly price, an easy-to-understand interface, and a great scope of highlights.
The most rugged models include the Wyze Camera OG, Wyze camera pan, and the Wyze Camera v3 which cater to both indoor and outdoor surveillance needs of your home.
This gadget is great for homeowners looking for a reasonable yet dependable solution, as these cameras strike a balance between affordability and advanced functionality.
In this blog post, we’ve put together a step-by-step guide to help you set up your Wyze camera flawlessly, so you can undoubtedly watch out for your home without worrying about it.
How Do I Set Up A Wyze Camera?
To get started, make sure you have a stable internet connection, the Wyze app, and your camera in pairing mode. Double-check that your device is linked to the 2.4 GHz network before you start.
Setting up the Wyze Outdoor is a bit different because it involves the base station.
Remember, Wyze cameras only work with a 2.4 GHz Wi-Fi network. Ensure your router is broadcasting this frequency. If your router combines the 2.4 and 5 GHz frequencies, consider disabling the 5 GHz option temporarily during setup.
Before you begin, download the Wyze app from your app store onto your phone or tablet. Install it, create an account if you haven’t already, or simply log in if you do.
Connecting Wyze Camera
Before setting up your Wyze Cam, ensure that you have your home Wi-Fi network up and running, and keep your network password handy. Remember, Wyze Cams operate on a 2.4GHz network, so if you’re using a 5GHz network, they won’t be compatible.
First things first, plug your Wyze Cam into a power outlet and wait for the status light to start flashing yellow. This indicates that the camera is powered on and ready for setup.
Now, flip the camera over and find the SETUP button on the bottom. Press and hold it until you hear a voice prompt, indicating that the camera is ready to connect.
Time to grab your phone or tablet and open the Wyze app. Here’s what to do next:
- Tap on “Add Device.”
- Select “Cameras” and then choose “Wyze Cam” (or “Wyze Cam Pan” if you’re setting up the Pan model).
- Follow the setup steps in the app, including scanning the QR code displayed on your device with your Wyze Cam.
While you’re setting up, keep an eye on the camera’s status light for these signals:
- Flashing Yellow: The camera is in setup mode, awaiting commands from the app.
- Flashing Blue: The camera is connecting to your Wi-Fi network.
- Flashing Yellow and Blue: Connection unsuccessful, the camera is now on standby for retry.
- Solid Blue: The connection is successful, and your camera is now linked to the network.
Make sure your Wi-Fi signal is strong where you’re planning to place the Wyze Cam to avoid any hiccups. After connecting it, you can start streaming video to the app and keep an eye on the area you’ve chosen to monitor.
Mounting the Wyze Camera
This is a vital stage in ensuring ideal observation coverage. Here’s a concise step-by-step guide:
- Choose the desired location for the camera, ensuring it offers a clear view of the area to be monitored.
- Use the provided mounting kit to securely attach the camera to the surface, ensuring it is firmly in place.
- Adjust the angle of the camera to achieve the desired field of view, making sure it captures the intended area effectively.
- Double-check the stability of the mount to prevent any potential issues or displacement.
Configuring Camera Settings
It is pivotal for optimizing surveillance performance. Follow these steps:
- Open the Wyze app and select the camera device.
- Navigate to the “Settings” menu and choose “Camera Settings.”
- Adjust video quality and resolution preferences to balance clarity and storage usage.
- Fine-tune motion detection sensitivity to suit your monitoring needs.
- Enable alerts for timely notifications of detected motion.
- Optimize night vision settings for enhanced visibility in low-light conditions.
- Save changes and ensure settings are applied.
With these steps, your Wyze Camera is arranged to convey ideal reconnaissance capacities customized to your inclinations.
Setting Up Your Wyze Outdoor Camera
Make sure to get your Wyze base station up and running before connecting any outdoor cameras, as they depend on it for network connection. Wyze recommends a maximum of four outdoor cameras for optimal reliability and efficiency.
Before setting up your outdoor camera, ensure you fully charge it, which typically takes around 4 hours. Once the camera indicator LED light switches from blinking to solid red, you’re good to go and can proceed with the setup process.
If you haven’t already, download and install the Wyze app from your app store. Open the app, and if you haven’t set up a Wyze account yet, go ahead and create one to get started.
Connecting To The Base Station
To set up your Wyze outdoor camera using the Wyze app, follow these simple steps:
- Launch the Wyze app on your smartphone.
- If you’re new to using the app, simply tap on “Add device.” If you’ve already set up devices in the app, just tap on the plus sign (+) at the top left corner to proceed.
- Choose “cameras” as the device type from the menu.
- Scroll through the options and select “Wyze Cam Outdoor.” Then, tap on the “Begin setup” button.
- Make sure you’re close to your base station to ensure proper communication.
- Turn on the power switch situated at the rear of the camera. You’ll see a solid yellow LED light indicating the camera is powered on.
- If you have multiple base stations, choose the one you want to link your camera to.
- Press the SYNC button located at the base of your Wyze Cam. You’ll hear a voice prompt saying “Pairing is in progress. Please wait.” The indicator light will flash yellow and blue before settling on solid blue once the setup is complete.
- After pairing, you’ll be prompted to name your camera. Choose a name and hit “finish” to complete the process.
- Find a suitable location for mounting the camera, ensuring the right side is facing up and the SYNC button is facing down. Avoid areas with direct sunlight and heavy traffic, as well as places with waving branches to prevent false sensor detections.
Final Thoughts
Setting up your Wyze camera is a breeze when you follow the right steps. Just make sure you have a strong internet connection, power up your Wyze cam, and have the Wyze app ready.
Remember to interface with a 2.4 GHz Wi-Fi network to keep away from connection issues. You can adjust your router settings through the online portal or disable the 5 GHz option during setup.
If your camera is compatible with Alexa or Google Home, link it to enjoy voice commands and view feeds on your devices.