Digital cameras have seen significant growth in the world of smart home security. Meanwhile many companies are now producing high-quality WiFi connected cameras to enhance your home security. These cameras provide home monitoring, motion detection alerts and various other features through remote control from anywhere. These cameras will ensure the security of your home.
Mercury Innovations’ Geeni brand stands out as one of the most affordable and dependable options in the market. After getting your hands on a Geeni smart Wi-Fi camera, the next task is to connect it to your home network for customization and control.
Connect To Wi-Fi Network – Geeni Camera Setup
To integrate your Geeni smart camera into your home network, start by downloading the Geeni app. Connect your mobile phone to a stable 2.4 GHz Wi-Fi network, ensuring that, if your router combines 2.4 and 5 GHz on one SSID, you separate them. Disable VPN and Ad Guard on your device, then position the camera near the router before relocating it to its final spot.
Download the Geeni app (available on iOS and Android), register an account, set up your location, agree to terms, and verify your account. For Android users, avoid using the “login with Google” option; instead, follow the sign-up process, verify your account, and establish a secure password.
Remember to enable location and Bluetooth, granting necessary permissions for location access as it aids in discovering devices on your network. Following these steps will seamlessly add your Geeni smart camera to your home setup.
Including The Camera to The Geeni App
Setting up your Geeni camera on the app is a breeze once you’ve taken care of the basics. Here’s a step-by-step guide to walk you through the process:
Start by powering up your camera – simply connect it to a functioning power outlet.
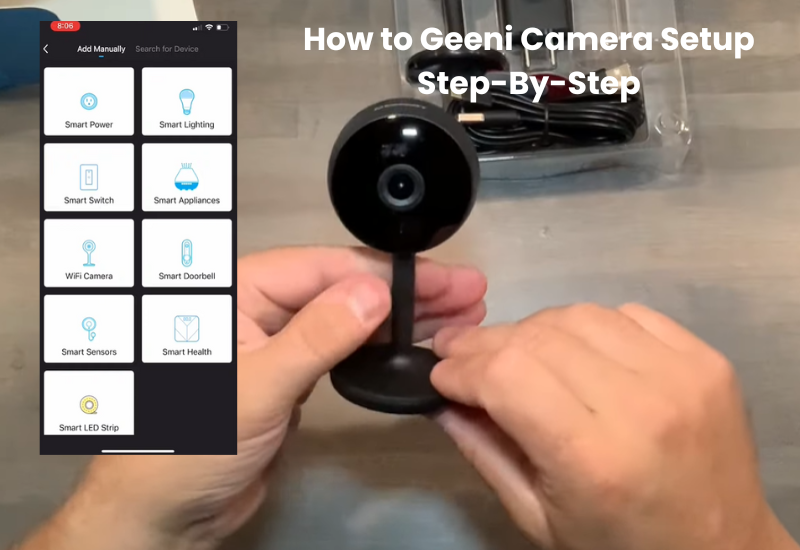
Now, open the Geeni app. Look for the top right “+” icon or the “Add Device” button if your app currently has no devices.
Choose the device category; opt for “Wi-Fi camera” from the list.
Connect to your home network by selecting the 2.4 GHz SSID and entering the correct password. Hit “Next Step.”
Ensure your camera is flashing quickly. Confirm this by clicking the “Yes, it is flashing quickly” radio button. If not, press the reset button for 10 to 20 seconds to activate pairing mode.
The Geeni app provides two connection modes – QR mode and Easy mode. Choose Easy mode to skip scanning the QR code. However, QR mode is the default option.
Scan the QR code from 4 to 6 inches, following the on-screen demonstration. Upon a successful scan, listen for a voice prompt and tap “I heard a prompt” to proceed.
Let the app discover, register, and initialize the camera. A success window will pop up once the device is added.
Click the edit icon to give your camera a custom name. Hit Done to complete the setup.
On your home screen, locate the camera. Tap it to access the live feed and personalize the settings to your preference. Your Geeni camera is now ready to go!
Installing The Camera
Connect the camera to a reliable power source, either wired or wireless. Complete the installation by syncing the camera with the mobile app, enabling seamless remote monitoring and control. Follow the installation steps:
- Unboxing and Placement: Begin by carefully unpacking your Geeni camera. Choose an optimal location with a clear view of the surveillance area.
- Power Source Connection: Depending on your preference, connect the camera using either a wired or wireless power source. Ensure a reliable power supply for uninterrupted functionality.
- Syncing Process: Follow the manufacturer’s instructions to sync your Geeni camera with the accompanying mobile app. This step establishes a connection for remote monitoring and control.
Power Source Requirements
Ensure a seamless Geeni camera experience by understanding its power requirements:
- Wired or Wireless: Decide between a wired or wireless power setup based on your preferences.
- Evaluate Battery Life: For battery-operated cameras, manage battery life effectively with optimization tips.
- Power Supply Reliability: Regardless of the chosen power source, guarantee uninterrupted functionality by ensuring a reliable power supply.
Motion Detection And Alerts
Master Geeni camera’s motion detection and alerts for enhanced surveillance:
- Configure Motion Detection: Set up precise motion detection by adjusting sensitivity settings to avoid false alarms.
- Real-time Alerts: Receive instant notifications on your mobile device when motion is detected, keeping you informed and in control.
Understanding these elements ensures that your Geeni camera catches critical occasions while limiting pointless cautions, giving a complete and responsive security arrangement.
Connectivity Problems
Troubleshoot Geeni camera connectivity issues with these expert tips:
- Wi-Fi Reconnection: Seamlessly switch your Geeni camera to a new Wi-Fi network by following a systematic process.
- Signal Interference Solutions: Identify and resolve common signal interference problems that may impact your camera’s connectivity.
- Device Compatibility Check: Ensure your Geeni camera is compatible with your devices, avoiding potential conflicts that could lead to connectivity issues.
By addressing these common challenges, you’ll keep a strong connection, permitting your Geeni camera to satisfy its role as a dependable watchman of your environmental elements.
How Do I Connect My Geeni Camera to Wi-Fi?
When you’re connecting to a 5 GHz Wi-Fi network or if your camera is beyond your network range, make sure your device is on the same network, and disable your VPN during camera setup.
If your camera isn’t linking to Wi-Fi, several network factors might be causing issues. Here are some common problems affecting the camera pairing:
- Attempting to connect the camera to a 5 GHz Wi-Fi network, Geeni smart cameras support only the 2.4 GHz frequency band.
- Running a VPN or Ad-guard on your mobile device, masking its IP address, and restricting access to other devices on the network.
- Placing the camera too far from the router, exceeding its Wi-Fi range.
- Not granting necessary location or Bluetooth permissions during camera setup.
- Ensure your Wi-Fi network encryption is WPA2-PSK with AES authorization.
- Troubleshoot by setting up the camera in different modes – the Geeni app offers QR and Easy setup modes; try both to resolve connectivity issues.