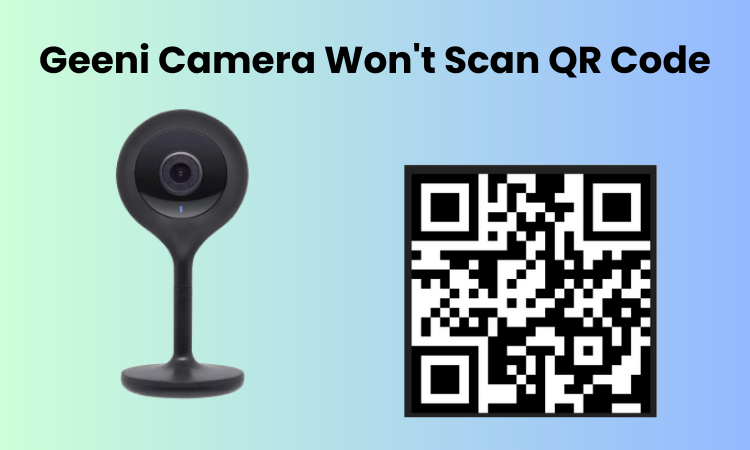
An essential step when you’ve set up your Geeni camera to connect to WiFi involves scanning. This strategy is normal across various camera marks and is generally thought to be a standard arrangement process.
However, numerous Geeni camera users have encountered an issue where their cameras fail to scan QR codes. Many people like you have dealt with this issue, so this article will show you the solution to your problem.
Your camera will not connect to WiFi until you successfully scan the QR code. As a result, it becomes unable to function or be controlled and operated via your app or voice assistant. Which will guide you to solve your problem through this article? Make sure your camera connects seamlessly to WiFi for optimal performance.
Why Geeni Camera Won’t Scan QR Code
Ensuring you scan the QR code on the Geeni app is a crucial step when setting up your camera, as it allows for the seamless transfer of network login credentials.
If you’re encountering issues with the QR code scanning process, consider the following potential reasons:
- Screen Conditions: Ensure that your screen is neither too dark nor too bright, as extreme lighting conditions can hinder the scanning process.
- Scanning Angle and Distance: Check that you are holding your device at the correct angle and distance for optimal QR code scanning. Incorrect positioning may lead to scanning difficulties.
- Mobile Device Damage: If your mobile device’s screen is heavily cracked, it might interfere with the camera’s ability to scan the QR code accurately.
- Camera Lens Cover: Make sure you have removed the lens cover from your camera before attempting to scan the QR code.
- Dirty Lens: A dirty camera lens can impede the scanning process. Wipe the lens clean and try scanning again.
- Screen Size: If your screen size is too small, it may pose a challenge for the camera to scan the QR code correctly. Consider using a device with a larger screen.
- Timing: Confirm that the camera is in pairing mode and that you are scanning the QR code within a reasonable timeframe. Prolonged delays or attempts to scan when the camera isn’t ready may cause issues.
If you identify a specific reason for the scanning problem, address it accordingly and attempt to rescan the QR code.
Few Ways To Fix Geeni Camera Won’t Scan QR Code – Troubleshooting Steps
If you’re having trouble getting your Geeni cam to scan the QR code, don’t worry—I’ve got some helpful tips and tricks for you. Keep reading to find out how to troubleshoot this issue.
Clean The Camera and Your Phone Lens
If your camera lens is dirty or covered in dust, it might have trouble scanning the QR code properly. The same goes for your mobile device – if there are smudges or dirt on the screen, it can interfere with the scanning process.
To ensure a clear scan, make sure to clean both your screen and camera lens. Grab a soft microfiber cloth and gently wipe away any prints or dirt. Once everything is nice and clean, go ahead and scan the QR code again.
Initial Setup and Pairing
To initiate the Geeni camera setup, download the Geeni app, create/log in to your account, and add the camera. Connect the camera to power, enter Wi-Fi details, and wait for pairing.
- Power on your Geeni camera and place it within range of your Wi-Fi router.
- Download the Geeni app from your device’s app store and open it.
- Create a Geeni account or log in if you already have one.
- Tap on the ‘+’ icon to add a new device.
- Select ‘Camera’ from the list and follow the on-screen instructions.
- Connect your Geeni camera to the power source and wait for the LED indicator to blink.
- Enter your Wi-Fi credentials when prompted.
- Wait for the app to detect and pair with your camera.
- Once paired, customize settings and enjoy your connected Geeni camera!
Accurately Scan QR code
Make sure your camera is in pairing mode, which is signaled by a blinking red LED. If it’s not, initiate setup by resetting the camera. Hold the reset button for 5-10 seconds until the LED flashes red. A steady red light indicates that the camera is in the process of powering up.
Geeni suggests positioning your mobile device 6-8 inches away from the camera, ensuring a clear lens by removing any film. Scan the QR code by pointing it towards the camera lens for 5-10 seconds. Adjust the distance and angle until you hear a beep. This ensures a successful pairing process for your camera.
Activate the Easy Setup Mode
Setting up your Geeni camera is a breeze with two convenient modes – QR and Easy setup. By default, the QR mode prompts you to scan the generated QR code to seamlessly transfer your Wi-Fi data to the camera. Conversely, the Easy mode skips the scanning step and effortlessly transmits the data automatically.
When configuring your camera, simply choose and enter your Wi-Fi network password, then select your preferred setup mode on the subsequent window. The QR mode is initially highlighted in the top right corner. To switch to Easy mode, tap the selection option and choose “EASY MODE” to proceed.
Switching to Easy Mode is straightforward:
- Open the Geeni app.
- Tap the “+” icon to add a new device.
- Select your device type (Wi-Fi camera).
- Select your 2.4 GHz Wi-Fi network and input the accurate password.
- Tap the top right selection option and choose “EASY MODE”.
- Verify that your camera is flashing, then proceed by tapping “Next.”
Once in Easy mode, your Geeni camera seamlessly connects to your 2.4 GHz Wi-Fi network. After the app locates, registers, and initializes your device, give it a name, tap done, and now your setup process is complete.
How do I scan a QR code with Geeni?
To easily transfer login details to your smart camera, just scan the QR code, streamlining the network connection process.
After powering up your Geeni camera, kick start the pairing mode by resetting it. Follow these steps to scan the QR code with your Geeni camera:
- Launch the Geeni app and log in to your smart device account.
- Add a new device by tapping on the “+” icon.
- Opt for a Wi-Fi Camera from the device category options.
- Connect to your 2.4 GHz network; select your network and input the correct password. Tap Next Step.
- Ensure QR Mode is selected in the setup mode on the next window.
- Choose “Yes, it is flashing quickly” and proceed by hitting Next.
- Position your phone’s screen 6 to 8 inches away from the camera and tilt it to alter the angle. Keep adjusting the distance until you hear the scanned beep. Alternatively, place your phone on the table and use the camera to scan the code.
- Upon hearing the beep, tap the “I heard a Prompt” button to continue with the setup process.
Reset The Geeni Camera
To reset your Geeni camera, locate the reset button near the power port. Follow the simple steps:
- Locate the reset button on your Geeni camera, usually found near the power port.
- Power on the camera and press the reset button using a paperclip or a similar tool.
- Hold the button until you see the LED indicator flash rapidly.
- Let go of the button and allow the camera some time to reset.
- Once reset, reconfigure your Geeni camera using the initial setup steps.
- This process provides a clean slate, often resolving issues hindering QR code scanning.
Updating The Geeni App and Firmware
To keep your Geeni camera at its best, regularly check for updates in your device’s app store. Follow the simple steps to update and firmware:
- Open your device’s app store and locate the Geeni app.
- Check for updates and install the latest version.
- Once the app is updated, open it and navigate to camera settings.
- Check for firmware updates and install if available.
- Follow the instructions displayed on the screen for a smooth update process.
- Regular updates ensure compatibility and resolve potential issues, ensuring optimal performance of your Geeni camera.
Final Thoughts
In troubleshooting your Geeni camera’s QR code scanning challenges, remember that patience and attention to detail are key. Regular maintenance, careful arrangement, and staying current with updates prepare for a consistently smart home excursion. With these experiences, you’re enabled to partake in the full advantages of your Geeni camera hassle-free.


